Organizations and user creation
Prerequisites
Before proceeding with the organization creation, ensure that you have the following prerequisites in place:
- Access to the system
- Database details (host, port, name, username, password)
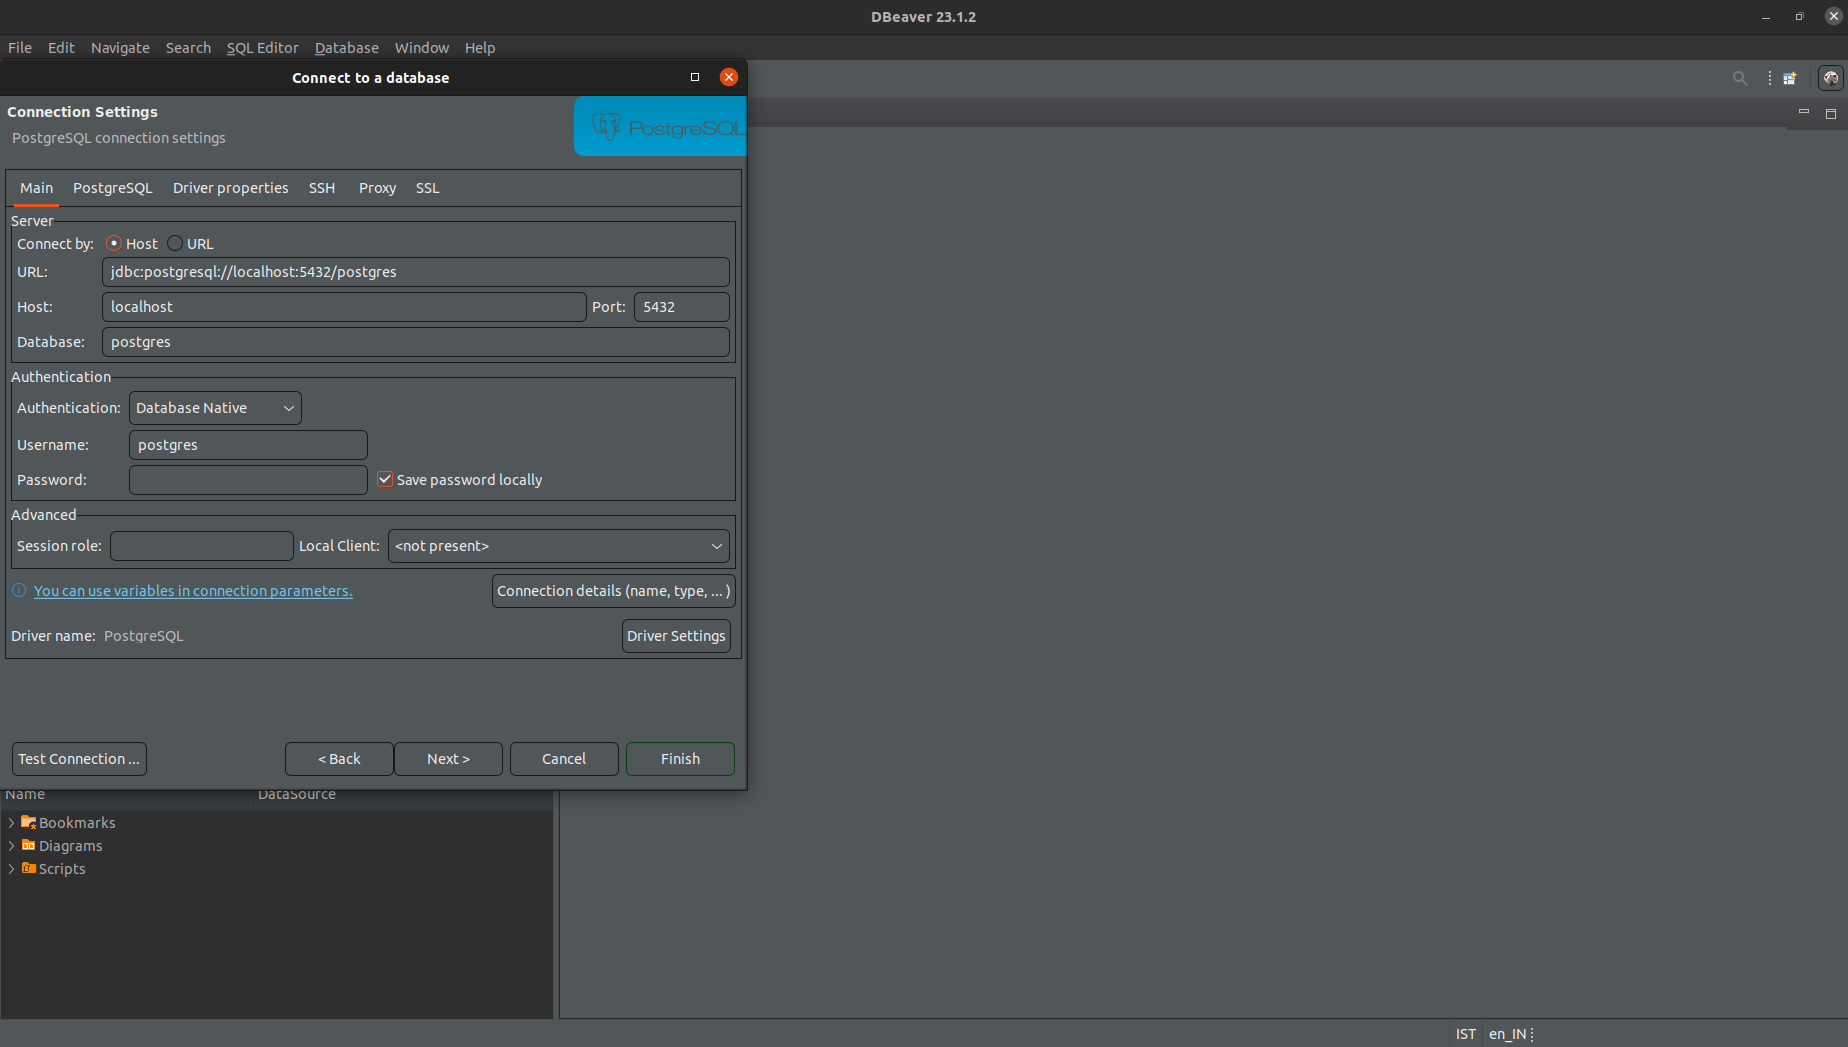
- DB tool like DBeaver installed and configured
Steps to Create an Organization
If you are creating a new user for an existing organization, you can skip this part.
Follow these steps to create an organization:
- Launch the DB tool (e.g., DBeaver) and connect to the PostgreSQL database server using the provided database details.
- Once connected, open a new SQL editor or query console.
- Run the following SQL query to create the organization:
INSERT INTO public.organizations (updated_at, created_at, "name", slug, settings)
VALUES (CURRENT_DATE, CURRENT_DATE, 'Organization Name', 'organization_slug', '{}'); - In the DB tool, navigate to the appropriate database and find the organizations table.
Create Groups
Once the organization is created, you can proceed with creating groups associated with the organization.
Prerequisites
Before creating groups, ensure that you have the following information available:
- Organization ID: The ID of the organization created in the previous step.
- Group Type: The type of the group (e.g., built-in, custom).
- Group Name: The name of the group.
- Group Permissions: The permissions assigned to the group.
Steps to Create Groups
Follow these steps to create groups for the organization:
Open the DB tool (e.g., DBeaver) and connect to the PostgreSQL database server.
Select the appropriate database that contains the organization and group tables.
Open a new SQL editor or query console.
Run the following SQL query to create a group:
INSERT INTO public."groups" (org_id, "type", "name", permissions, created_at)
VALUES(org_id, 'builtin', 'admin', '{"admin","super_admin"}', current_date);
INSERT INTO public."groups" (org_id, "type", "name", permissions, created_at)
VALUES(5, 'builtin', 'default', '{"create_dashboard","create_query","edit_dashboard","edit_query","view_query",
"view_source","execute_query","list_users","schedule_query",
"list_dashboards","list_alerts","list_data_sources"}', '2021-06-08');
Replace org_id with the ID of the organization, group_type with the type of the group, group_name with the name of the group, and set the desired permissions for the group. Also, update the current data in the following format YYYY-MM-DD.
Create users
Once the organization and groups are created, you can proceed with creating users and assigning them to the respective groups.
Steps to Create Users
Open the DB tool (e.g., DBeaver) and connect to the PostgreSQL database server.
Select the appropriate database that contains the organization, group, and user tables.
Open a new SQL editor or query console.
Generate an API key for the user using the following Python code snippet:
def generate_token(length):
    chars = "abcdefghijklmnopqrstuvwxyz" "ABCDEFGHIJKLMNOPQRSTUVWXYZ" "0123456789"
    rand = random.SystemRandom()
    return "".join(rand.choice(chars) for x in range(length))
Run the following SQL query to create a user: Before running the following SQL query to create a user, ensure you have the correct values for the placeholders:
org_id: The ID of the organization to which the user will be associated.name: The name of the new user you want to create.group_ids: The group IDs to which the user belongs. Update this with the relevant group IDs. For example, if the user belongs to groups 1, 3, and 5, the value should be '{1,3,5}'.token_from_generate_token_function: Replace this with the actual token obtained from thegenerate_tokenfunction, which will provide the necessary API access for the user.current_date: YYYY-MM-DD
After ensuring you have the correct values in place, you can run the following SQL query to create the new user:
INSERT INTO public.users (updated_at, created_at, org_id, "name", email, profile_image_url, password_hash, "groups", api_key, disabled_at, details, home_db_slug)
VALUES(current_date, current_date, org_id, 'name', 'test@test.com', NULL, NULL, '{8, 9}', 'token which you get from generate_token function', NULL, '{"is_invitation_pending": false}', NULL);
Creating the User in Firebase
To create the user with the same email in Firebase, you have two options:
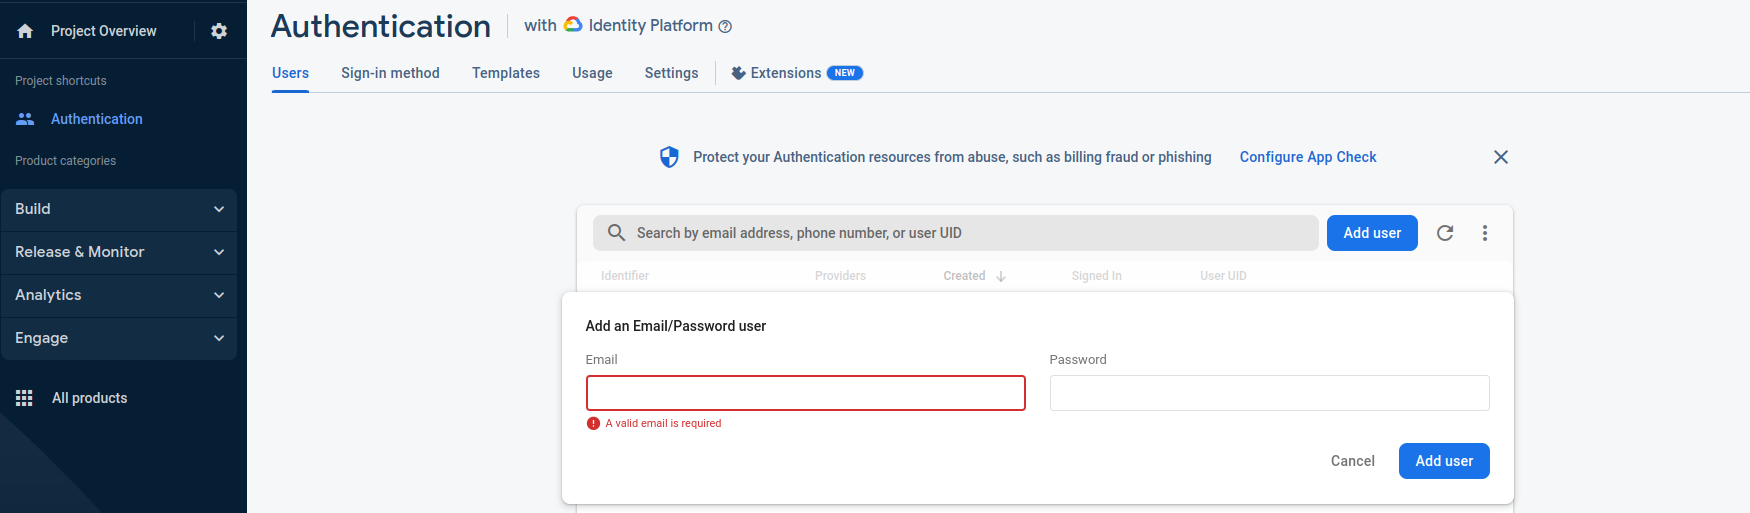
Option 1: Create via the Firebase Console
- Log in to your Firebase project using the Firebase console.
- Navigate to the "Authentication" section in the left sidebar.
- Click on the "Add User" button to create a new user.
- Enter the user's email and set a password (e.g., 'test@123') for the user.
Option 2: Create by Following the Code Snippet
Alternatively, you can create the user programmatically using the provided code snippet below. This snippet is written in Python and utilizes the Firebase Admin SDK to interact with Firebase Authentication. Make sure you have the Firebase Admin SDK set up correctly before using this code.
def create_user_firebase(email, org_slug, org_id, user_id, org_name, name):
    custom_claims = {}
    custom_claims["https://fabriq/jwt/claims"] = [{'fabriq_org_slug': org_slug, 'fabriq_org_id': org_id,
                                                            "fabriq_user_id": user_id, "fabriq_org_name": org_name}]
    user = auth.create_user(
        email=email,
        email_verified=True,
        password='test@123',  # Replace this with the desired password for the user
        display_name=name,
        disabled=False)
    print('Successfully created a new user in Firebase: {0}'.format(user.uid))

    auth.set_custom_user_claims(user.uid, custom_claims)
Remember to call the create_user_firebase function with the necessary parameters (email, org_slug, org_id, user_id, org_name, name) to create the user in Firebase with the custom claims.
Before running the code snippet, ensure you have the firebase-key-admin.json file in the same directory as the script. This file is required to initialize the Firebase Admin SDK with the necessary credentials.
firebase-admin-key.json
{
    "type": "xxx",
    "project_id": "xxx",
    "private_key_id": "xxx",
    "private_key": "-----BEGIN PRIVATE KEY-----\xxx\n-----END PRIVATE KEY-----\n",
    "client_email": "xxx",
    "client_id": "xxx",
    "auth_uri": "https://accounts.google.com/o/oauth2/auth",
    "token_uri": "https://oauth2.googleapis.com/token",
    "auth_provider_x509_cert_url": "https://www.googleapis.com/oauth2/v1/certs",
    "client_x509_cert_url": "xxx"
}
Updating Custom Claims for an Existing User
To update custom claims for an existing user, you can use the following Python code snippet. Replace the variables with actual values obtained during the user creation process.
import firebase_admin
from firebase_admin import auth

# Initialize the Firebase Admin SDK with the necessary credentials (firebase-key-admin.json).
# firebase_admin.initialize_app()

user = auth.get_user_by_email("user_email@example.com")
custom_claims = user.custom_claims

obj = {
    "fabriq_org_slug": "organization_slug",
    "fabriq_org_id": "organization_id",
    "fabriq_user_id": "user_id",
    "fabriq_org_name": "organization_name"
}

if custom_claims is not None:
    data = custom_claims.get("https://auth.fabriq.com/jwt/claims").get("fabriq_orgs")
    new_list = []
    fabriq_org_slug = set()
    isAvailable = False

    for objData in data:
        print("obj", objData['fabriq_org_slug'])
        if objData['fabriq_org_slug'] not in fabriq_org_slug:
            if objData['fabriq_org_slug'] == obj.get("fabriq_org_slug"):
                isAvailable = True
            new_list.append(objData)
            fabriq_org_slug.add(objData['fabriq_org_slug'])

custom_claims_filter = {
    "https://auth.fabriq.com/jwt/claims": {
        "fabriq_orgs": new_list
    }
}

custom_claims = custom_claims_filter
if custom_claims is None:
    fabriq_orgs = [obj]
    custom_claims = {
        "https://auth.fabriq.com/jwt/claims": {"fabriq_orgs": fabriq_orgs}}
else:
    if not isAvailable:
        claim_obj = custom_claims["https://auth.fabriq.com/jwt/claims"]
        orgs_list = claim_obj["fabriq_orgs"]
        orgs_list.append(obj)

        custom_claims = {
            "https://auth.fabriq.com/jwt/claims": {"fabriq_orgs": orgs_list}}

auth.set_custom_user_claims(user.uid, custom_claims)
result = auth.get_user_by_email('user_email@example.com')
custom_claims = result.custom_claims
Replace these variables with actual values obtained during the user creation process.
user_email@example.com: The email address of the user you want to update the claims for.organization_slug: The slug of the organization to which the user belongs.organization_id: The ID of the organization to which the user belongs.user_id: The ID of the user you want to update the claims for.organization_name: The name of the organization to which the user belongs.
Ensure that you have the firebase-key-admin.json file in the same directory as this script to initialize the Firebase Admin SDK with the necessary credentials.