Salesforce
Setting up the Salesforce source connector involves creating a read-only Salesforce user and configuring the Salesforce connector through the Fabriq UI.
Prerequisites
This page guides you through the process of setting up the Salesforce source connector.
| Feature | Available |
|---|---|
| Auth | Yes |
| Managed syncs (common, standard objects, custom objects) | yes |
| Managed syncs: incremental deletes | Yes |
| Action API (common objects) | yes |
| Real-time events | yes |
Supported common object types:
- Account
- Contact
- Lead
- Opportunity
- User
Connect
Auth Connection

- Click on the Connect.
- You will be redirected to the OAuth provider's website.
- Follow the prompts to log in to your account or create a new account if necessary.
- Once authenticated, review the requested permissions and grant access.
- After granting access.
- Return to the pipeline connection page and click continue.
Salesforce OAuth credentials.
Credentials Connection

- User Name - Enter your Salesforce username associated with the account you wish to connect.
- Password - Provide the password for your Salesforce account.
- Security Token- Salesforce requires a security token for API access. Please generate and provide your security token.
- After entering the details & click continue.
Configure
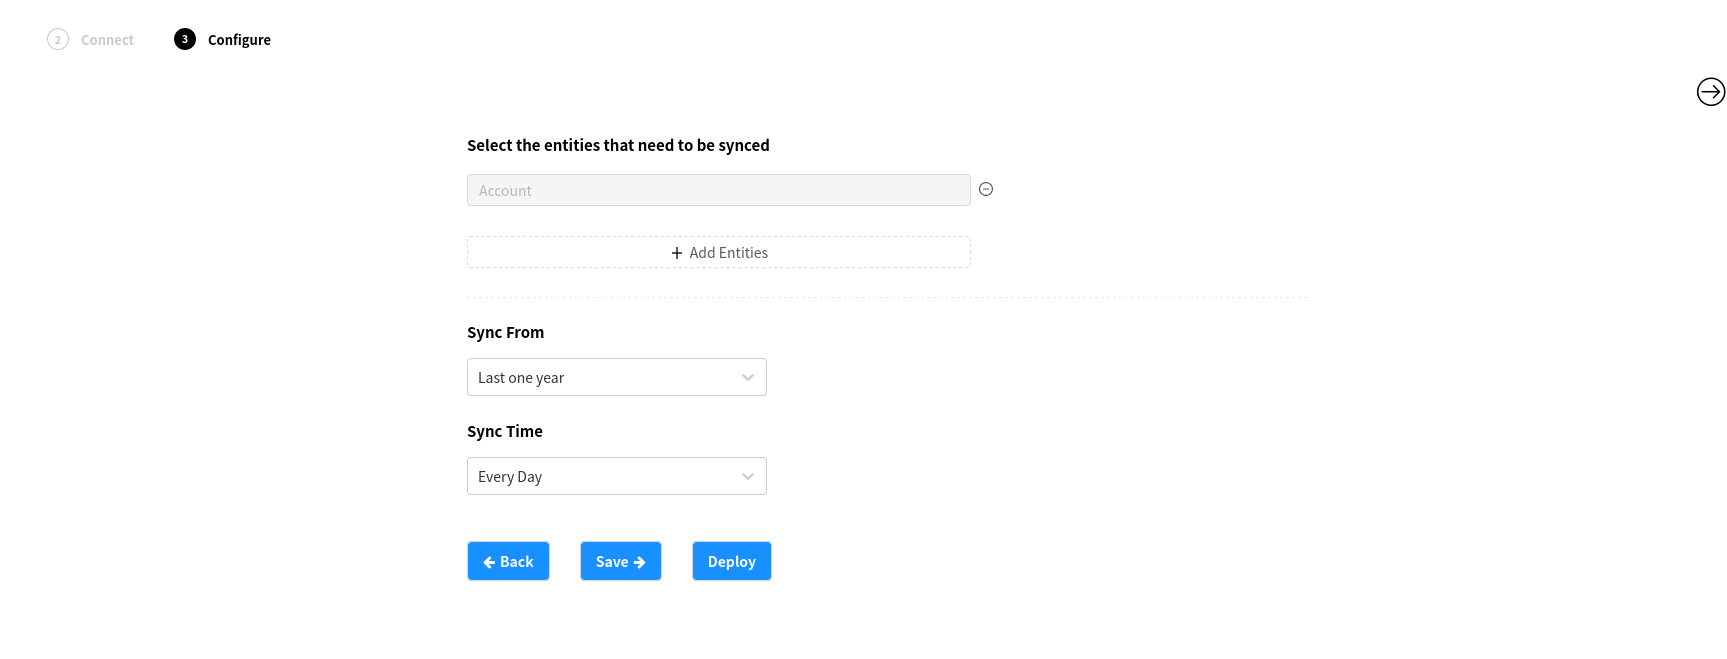
- Select the entities that need to be synced by Clicking the Add Entities button.
- Locate the Sync From dropdown menu and select the desired source or sync option.
- Similarly, find the Sync Time dropdown menu and choose the preferred synchronization interval or timing.
- Once you have selected the appropriate options, click on the Save button to save the configuration.
- Locate the Deploy button and click on it.
- The deployment process will begin, and once it is completed will create new source in you airbyte workspace, you will be automatically redirected to the sync page.
Pipeline View
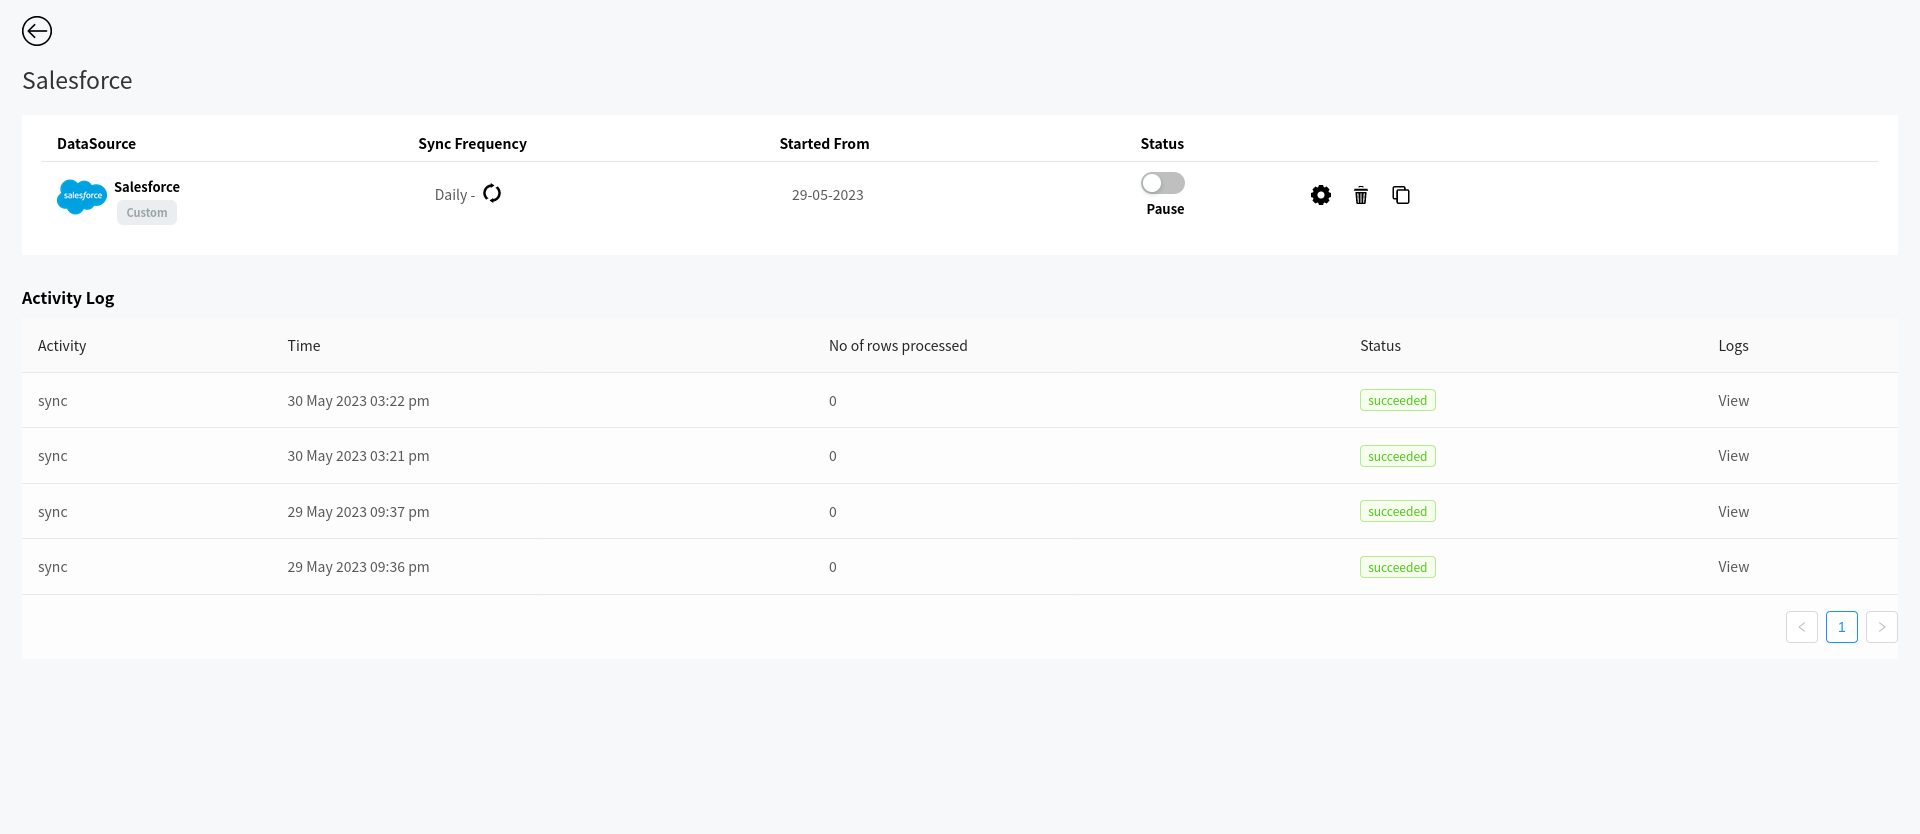
- Locate the Sync Frequency icon click on it.
- This action will initiate the sync trigger in airbyte, causing the data synchronization process to start.
- After the sync is triggered, you can monitor the progress and view detailed logs by clicking on the View option from the table.